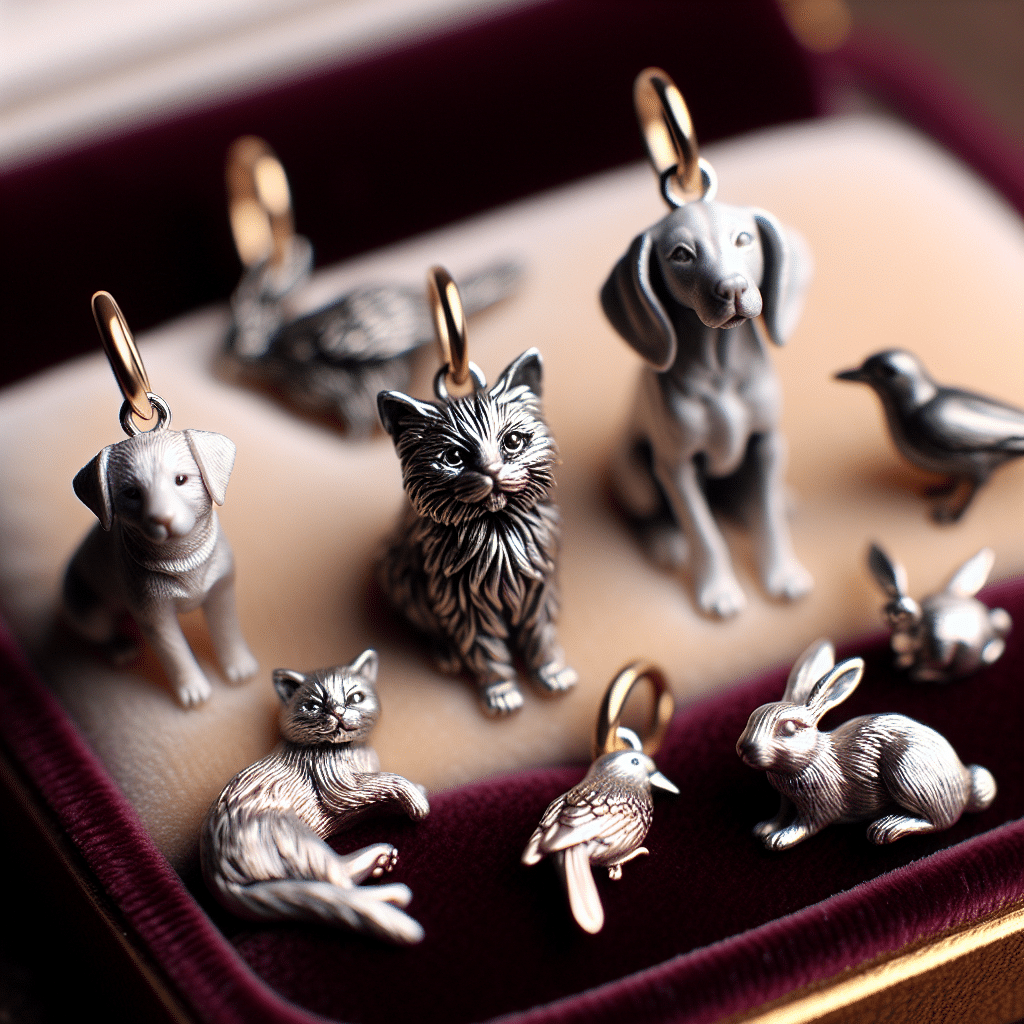
Designing Miniature Pet Models for Pendants
Designing miniature pet models for pendants is an art form that combines creativity, technical skills, and a passion for animals. This guide focuses on both the design process and the practical steps involved in creating stunning pendants that capture the essence of beloved pets.
Understanding Scale and Proportions
When designing miniature pet models, it’s crucial to understand scale and proportions. Miniature models typically require a reduction in size while still maintaining recognizable features. A common scale ratio for pendant designs is 1:12 or 1:24, where you would design each element to be twelve or twenty-four times smaller than the actual pet.
To accurately reflect the pet’s unique characteristics, start with a series of reference photos. Different angles and lighting help in capturing the pet’s fur texture, facial expressions, and color patterns.
Choosing the Right Materials
The choice of materials affects not only the aesthetic but also the durability of the pendant. Here’s a rundown of commonly used materials:
-
Polymer Clay: This is favored for its versatility and ease of use. Polymer clay allows for detailed sculptures and is available in a variety of colors. Once shaped, it can be baked to harden and finished with a varnish for additional shine and protection.
-
Resin: Epoxy resin can be molded into intricate shapes and can be combined with pigments for vibrant colors. This material is perfect for creating a glossy finish that mimics the look of glass.
-
Metal: For those seeking a more durable and upscale look, metal materials like silver or gold can be used. Casting techniques can reproduce detailed features and textures, while soldering can assemble components in intricate designs.
-
Wood: Wooden pendants are a more rustic option. A laser cutter can produce precise designs, and natural finishes highlight the timber’s grain and character.
Sketching Your Design
Before commencing with your chosen material, sketching your design is crucial. It serves as a conceptual blueprint. Here are steps to create effective sketches:
-
Formulate Your Concept: Consider poses that express the pet’s personality—think about whether you want a playful stance, serene sleeping position, or an action pose.
-
Outline Key Features: Identify which features are essential to capture your pet’s likeness, such as the shape of ears, tail position, or unique markings.
-
Layered Sketching: Start with basic shapes and gradually add details. Use different layers to illustrate color or texture variations, which can guide you when working with materials.
Creating the Model
Once your sketches are complete, it’s time to move onto creating the model. Here’s a breakdown by material:
Polymer Clay Method
-
Preparation: Condition the clay until it’s soft and workable. Choose the base color that most closely matches your pet.
-
Creating the Base Shape: Form the body, legs, and head based on your sketches. Ensure the proportions are accurate relative to the predetermined scale.
-
Adding Details: Use tools to add facial features like eyes, nose, and mouth. Textures can also be added for fur using a needle tool or a toothbrush for more realistic effects.
-
Baking: Follow the manufacturer’s instructions regarding baking temperature and time to harden the clay.
-
Finishing Touches: After cooling, apply paint or a varnish to enhance features and provide a glossy finish.
Resin Method
-
Molding: Create a mold of your miniature by either sculpting it directly in a suitable mold material or pouring resin into a pre-made mold.
-
Layering Colors: If using multiple colors, layer them carefully. Pouring clear resin first allows you to capture details before adding color.
-
Curing: Let the resin cure as per the instructions, typically around 24 hours.
-
Sanding and Finishing: After the resin has set, you may sand edges for smoothness and apply a topcoat of clear varnish.
Attaching the Pendant Loop
Integrating a functional pendant loop is crucial for the final piece:
-
Positioning the Loop: While the model is still soft (in case of polymer clay) or before pouring if using resin, ensure the loop is in a waterproof area to avoid future damage.
-
Using Jump Rings: For metal designs, after finishing the model, you can attach a jump ring for necklace chains. Soldering or hammering may be required for permanence.
Painting and Finishing
Regardless of which method you choose, finishing touches are essential.
-
Painting: Use high-quality paints suitable for your material. Acrylic paints work well on polymer clay, while alcohol inks are great for resin.
-
Sealing: For polymer clay, a clear glaze will provide protection against scratches and highlight colors. Resin generally comes with a smooth finish that doesn’t require sealing.
Troubleshooting Common Issues
-
Cracking in Polymer Clay: Ensure you condition your clay properly. Avoid over-baking, which leads to brittleness.
-
Cloudy Resin: This usually happens if the mixing ratio is off. Always follow instructions precisely for the best results.
-
Detail Loss: If small details are lost in the sculpting process, consider using paint and brushes to add back those features after the base model has dried.
Marketing Your Pendants
If transitioning from hobby to business, consider these marketing angles:
-
Social Media: Share your design process through Instagram or TikTok to attract pet lovers.
-
E-commerce: Platforms like Etsy provide a niche market for handcrafted, unique items. Optimize product descriptions with SEO-rich keywords like “custom pet pendant” or “miniature pet jewelry.”
-
Craft Fairs: Showcasing at local fairs can create connections with fellow pet lovers and jewelry enthusiasts.
-
Client Customization: Offering custom designs can increase demand. Ask for photos or unique features to capture that personal connection.
Miniature pet models for pendants present a rewarding endeavor, merging artistry with meaningful keepsakes. Whether for personal enjoyment or as a business venture, mastering these techniques can lead to enchanting results.