How to Print a Cat Silhouette Pendant
Creating a cat silhouette pendant can be an enjoyable craft that combines creativity with the modern technology of 3D printing. This article will guide you through the process step-by-step, including design, preparation, printing, finishing, and suggested materials to achieve the perfect cat-shaped accessory.
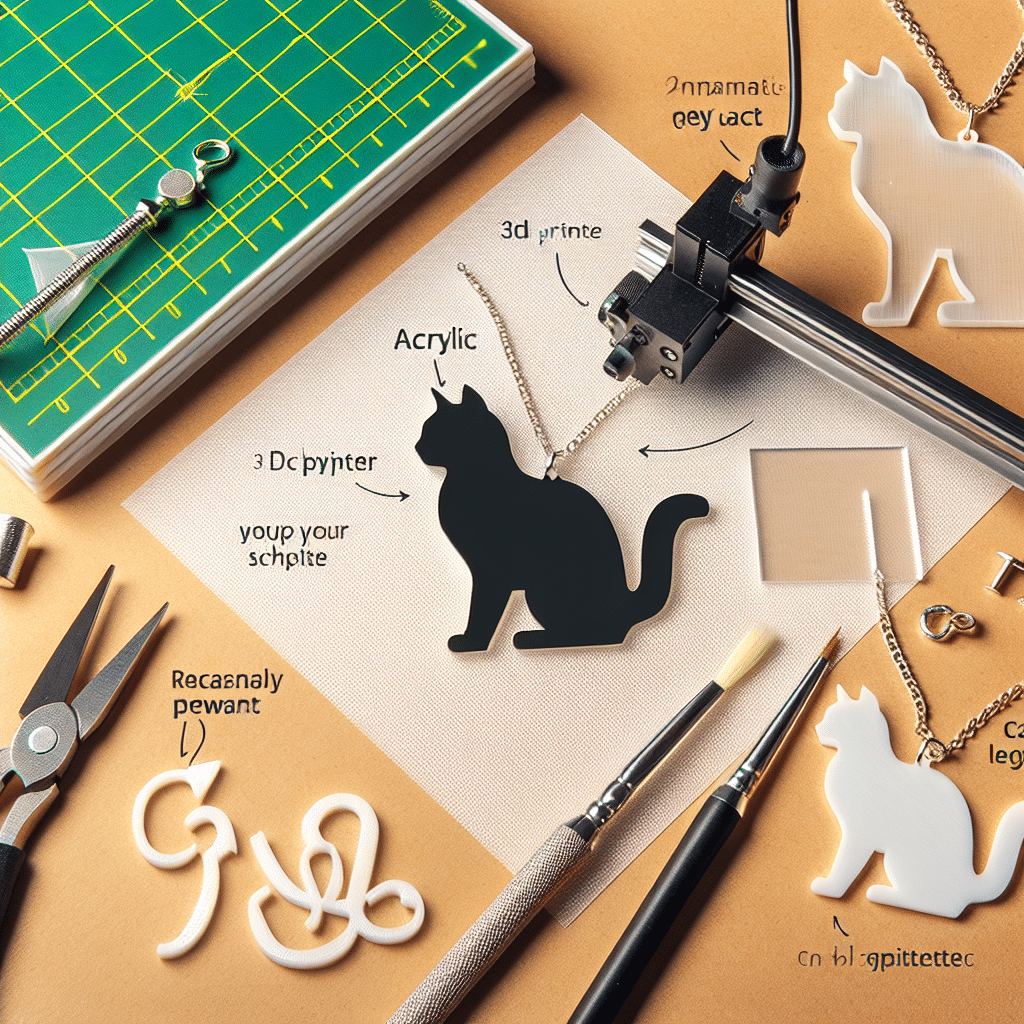
Materials Needed
- 3D Modeling Software: Options include Tinkercad, Fusion 360, or Blender.
- 3D Printer: FDM (Fused Deposition Modeling) printers are commonly used for jewelry.
- Filament: Choose PLA (Polylactic Acid) for ease of use, or PETG for durability.
- Sanding Tools: Various grits for finishing.
- Jewelry Chain or Cord: To hang the pendant.
- Jump Rings: For attaching the pendant to the chain.
- Safety Glasses: For eye protection when sanding.
Step 1: Designing the Pendant
Start with the design of your cat silhouette. Utilize user-friendly software like Tinkercad, which is web-based and excellent for beginners.
- Create a New Project: Open Tinkercad and create a new design.
- Basic Shapes: Use basic shapes to form a cat. Use a combination of ellipses, triangles, and rectangles to create the cat’s body, ears, tail, and head.
- Combining Shapes: Group the components together to form a cohesive silhouette. Ensure to simplify the design for effective printing.
- Measurement: Aim for a pendant size between 2 to 3 inches in length; this ensures visibility while wearing.
- Holes for Attachment: Don’t forget to add a small hole at the top of the pendant for the jump ring. This is crucial for attaching to a necklace chain.
Once satisfied with your design, export it as an STL (Standard Tessellation Language) file, which is compatible with most slicing software.
Step 2: Slicing the Model
Next, you’ll need to convert your STL file into G-code, the language that 3D printers understand.
- Choose Slicing Software: Use software like Cura or PrusaSlicer.
- Import the STL File: Load the exported file into the slicer.
- Adjust Print Settings: Set the layer height between 0.1 mm to 0.2 mm for a smooth finish. Configure the infill percentage; 10-20% is generally sufficient for a pendant.
- Select Material: Ensure the slicer recognizes the filament type you’re using.
- Generate G-code: After configuring the settings, generate the G-code file that your printer will use.
Step 3: Preparing the Printer
Before printing, it’s essential to prepare your 3D printer effectively.
- Calibrate the Printer: Make sure your printer is level and calibrated to ensure first layer adhesion.
- Load the Filament: Insert your chosen filament into the printer and ensure it feeds correctly through the extruder.
- Build Platform: Make sure the print bed is clean. Use painter’s tape or a glue stick for better adhesion if necessary.
Step 4: Printing the Pendant
With everything set, it’s time to print!
- Start the Print: Upload the G-code to your printer via SD card or USB connection and start printing.
- Monitor the Print: Keep an eye on the printing process for any issues, such as warping or filament jams.
- Completion: Once printing is complete, allow it to cool before removing the pendant from the print bed.
Step 5: Finishing Touches
Post-printing, your pendant may require some finishing to enhance its appearance and functionality.
- Sanding: Use fine-grit sandpaper to smooth out any rough edges. Start with a medium grit to remove major imperfections and then use fine grit for a polished finish.
- Cleaning: Wipe the pendant clean to remove any dust or debris.
- Painting (Optional): If desired, you can paint your pendant using acrylic paint. Use a spray sealer afterward to protect the finish.
- Attachment: Loop a jump ring through the hole in the pendant and attach it to the necklace chain or cord of your choice.
Step 6: Displaying Your Pendant
Once finished, put on the pendant and enjoy showcasing your unique piece. Alternatively, consider gifting it to a fellow cat lover or selling it online on platforms like Etsy.
SEO Optimization Tips
To ensure your article is SEO-friendly and reaches a wider audience:
- Keywords: Utilize relevant keywords such as “3D printing cat silhouette pendant,” “DIY cat jewelry,” and “how to make a pendant.”
- Headings and Subheadings: Use H2 and H3 tags to structure the content for better readability and indexing by search engines.
- Internal Links: Link to other related content on your website, such as how to start 3D printing or other jewelry-making tutorials.
- External Links: Provide links to reputable sources regarding 3D printing, materials used, and design software recommendations.
By following these guidelines, you can successfully print a cat silhouette pendant and create a piece of jewelry that showcases your love for felines while enjoying a fulfilling crafting experience.